Free Project: Final Website Upload
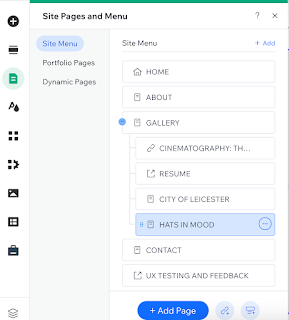
As I have finished creating the flipbook, I will continue to upload it on to my website. I began by clicking the '+Add Page' button the bottom of the page, renaming it into the title of my project 'Hats in Mood' and then selecting the 'Blank Page'.
I then continue to add on the title on to the page by selecting 'Add Element' on the left hand side and selecting the 'Heading 2' option. I then changed the colour to match with my other profile pages and set the size to 70.
To insert the flipbook, I selected the 'Add Element' again and this time selecting the 'Embed Code' option. I then clicked the 'HTML' and then the 'Website address' as I have received the website link for my flipbook from the online software website. I then pasted the link onto the given section.
I then decided to add a small description on what this project is about by clicking 'Add Element', 'Text', and selecting 'Heading 5'. Changing the colour to black and the size to 20 whilst placing the text under the title.
Thus, this is the final result of the page.
Reflection:
As I have done this before, it was quite easy for me to navigate and upload the flipbook onto my website. i am satisfied with the results overall however, I do think that the background of the flipbook should have matched with the background colour of my website to make it even.


Comments
Post a Comment