Class Work: Sequential Images
Last week in class, we discussed about sequential images and the concept of it. With my partner, Oliwia, we made sequential images using our mobile phones. I took the images using an Apple iPhone 13 with a Wide Camera at 26 mm on Monday, the 9th of January. The ISO is 80 and were taken in HEIF format therefore I will have to convert it to JPG later on. The concept we made was the process in making a paper airplane, a simple but fun idea.
As shown in the screenshot above, when I selected the folder, it will seem as though it is empty but it is not. I then selected 'Select Folder' and clicked 'OK'.
I downloaded the images from my mobile phone to my google drive folder and shared a link with Oliwia.
As the images were saved as an HEIC, I converted the images to JPG using an online converter called 'CloudConvert' . The converter I used only allowed 4 converts at a time and I had 10 images, therefore I clicked the "Select File" button and selected 4 images (as shown below).
I downloaded the finished images and saved them in a new folder on my desktop called "Sequential Images".
As I have successfully downloaded the images, I will now create contact sheets using Photoshop. In Photoshop, I clicked the 'file' button and scrolled down. I then clicked the option 'automate' and selected the option called 'contact sheet II'.
I then clicked the option that says 'choose...' and selected the folder containing my sequential images.
Shown below is my successfully made contact sheet in Photoshop.
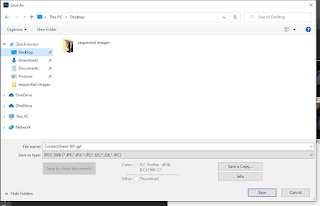
After successfully creating the contact sheet, I saved it to my desktop while also changing the format from Photoshop to JPEG. Therefore, I can upload it to my blog.


Comments
Post a Comment